I was planning a final week of gift guides, but I got distracted by freezing temperatures and the exceptionally perfect chalky blue of juniper berries and so instead I decided I’d close out the season and celebrate the solstice with two projects that are one hundred per cent—or close enough—free and even more magic than that. They’re projects for celebrating winter and for making now in these very darkest days, and again in mid-February when the chill is still here, but the romance may be waning. 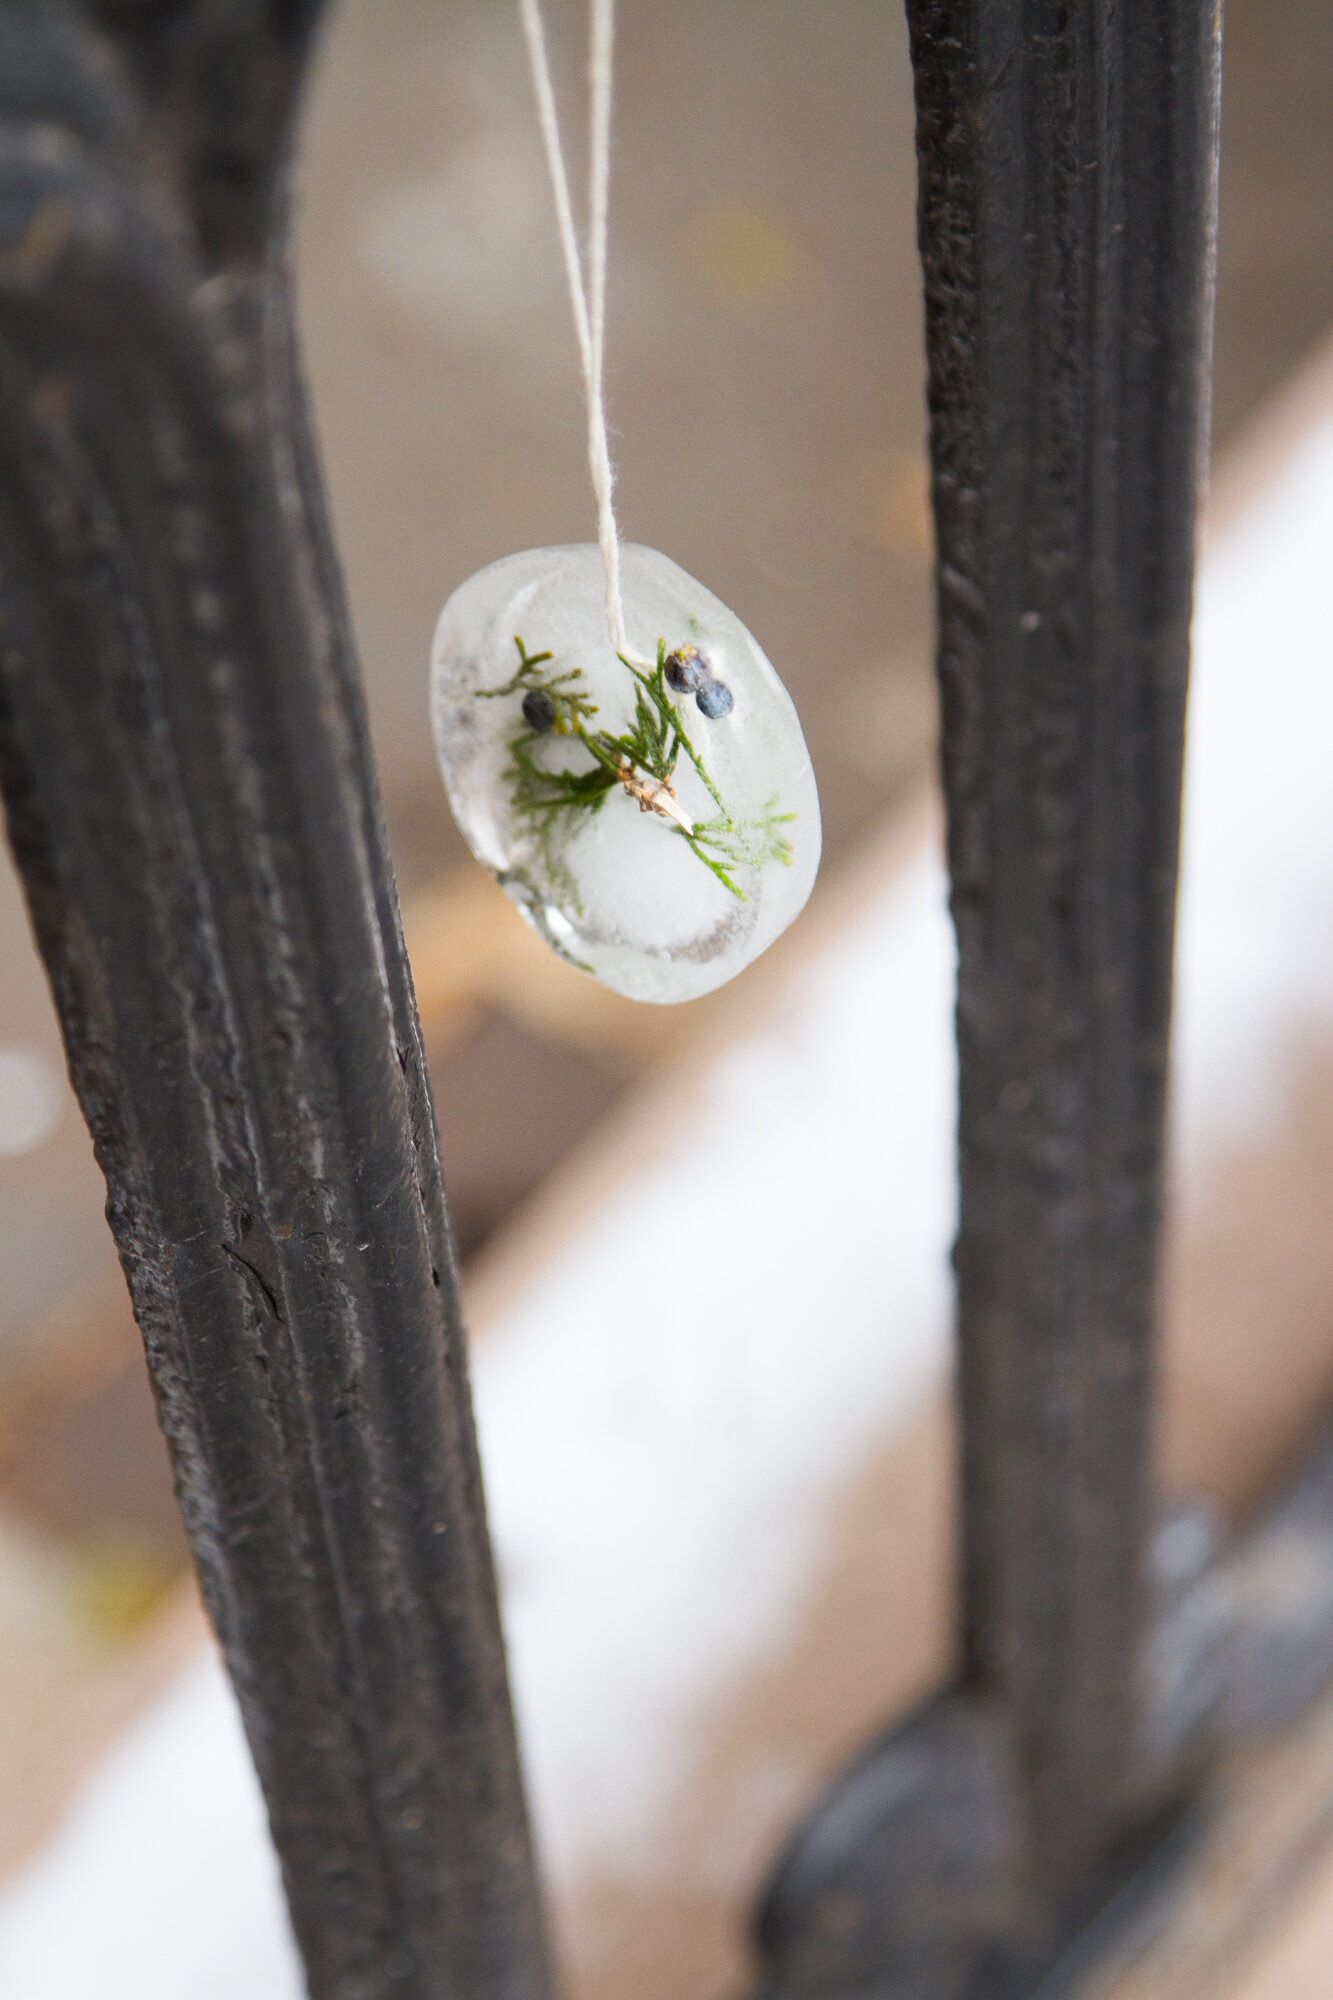
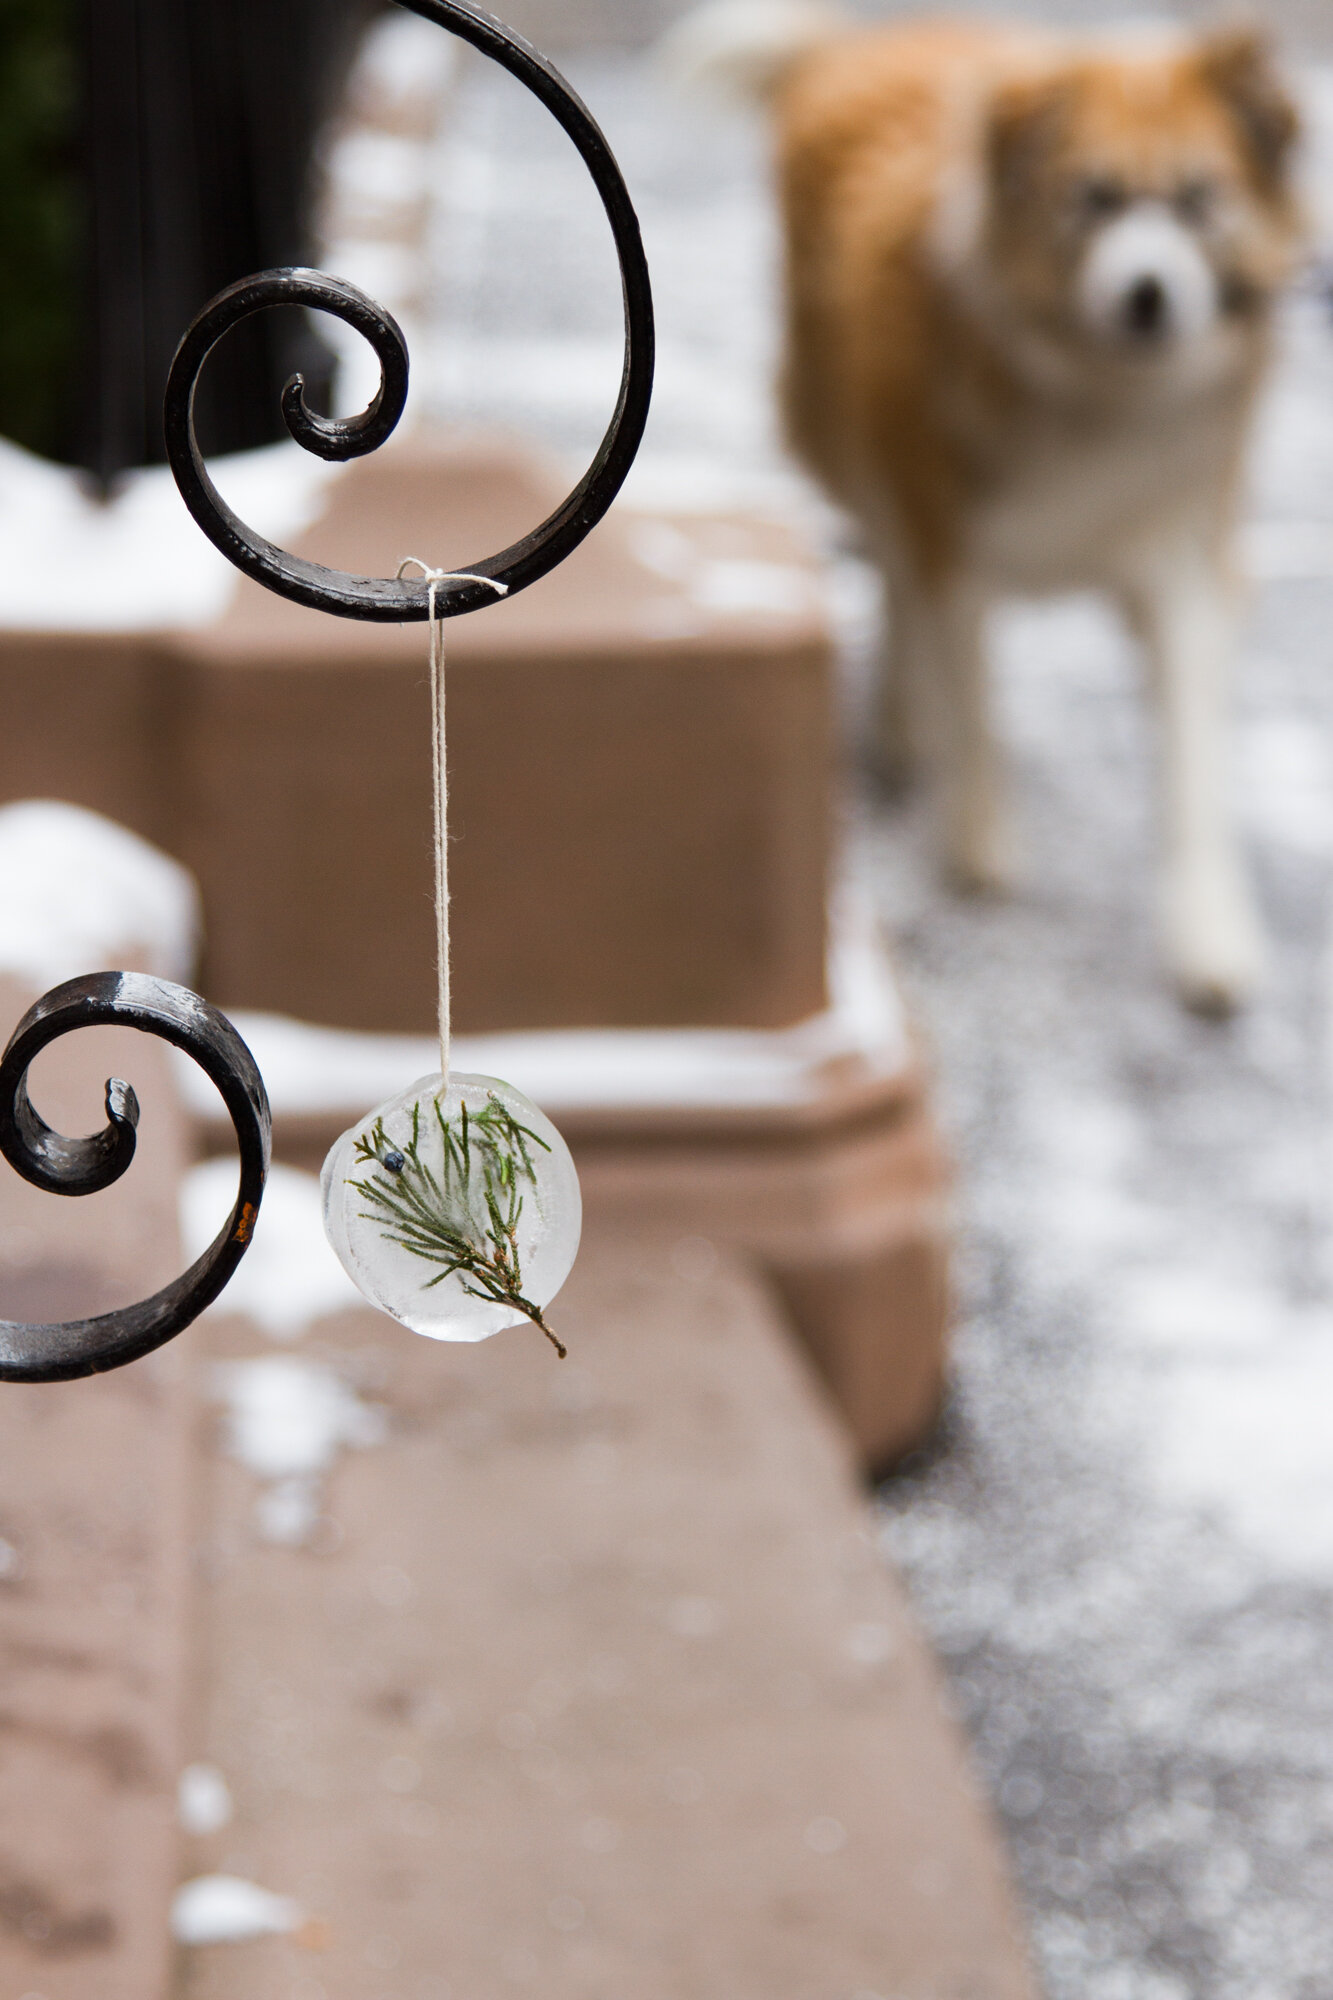
First up: Ice ornaments. Last week Faye and I were reading The Animals’ Santa—a book which I’ve come to realize isn’t really my very favorite, but which did does include the delightful idea of a rabbit brother hanging tiny shards of ice to make sparkly wintertime chimes. Because there’s never been an ephemeral wintertime decoration I didn’t like, here we are.
Without an outdoor tree of our own, we decided we’d make like merry elves and festoon the neighborhood instead, leaving tiny icy ornaments on doorsteps and iron fences and on any low enough branches we could find. If you do have a tree nearby ready for decorating, I think a whole tree full of these guys would be magical.
Ice ornaments will last just as long as the temperatures stay freezing, so the key is to fill them with things that won’t offend once melted. Skip the glitter and beads, for instance, and choose wintry bits that are Earth and bird-friendly and can disappear back into the environment without too much trouble.
Here’s the step-by-step:
Ice Ornaments
What you need:
A muffin tray
Water
Wintry bits: juniper clippings, orange slices, bird seed, cranberries, star anise, etc. (In other words, most anything you’d like.)
Twine
Scissors
What to do:
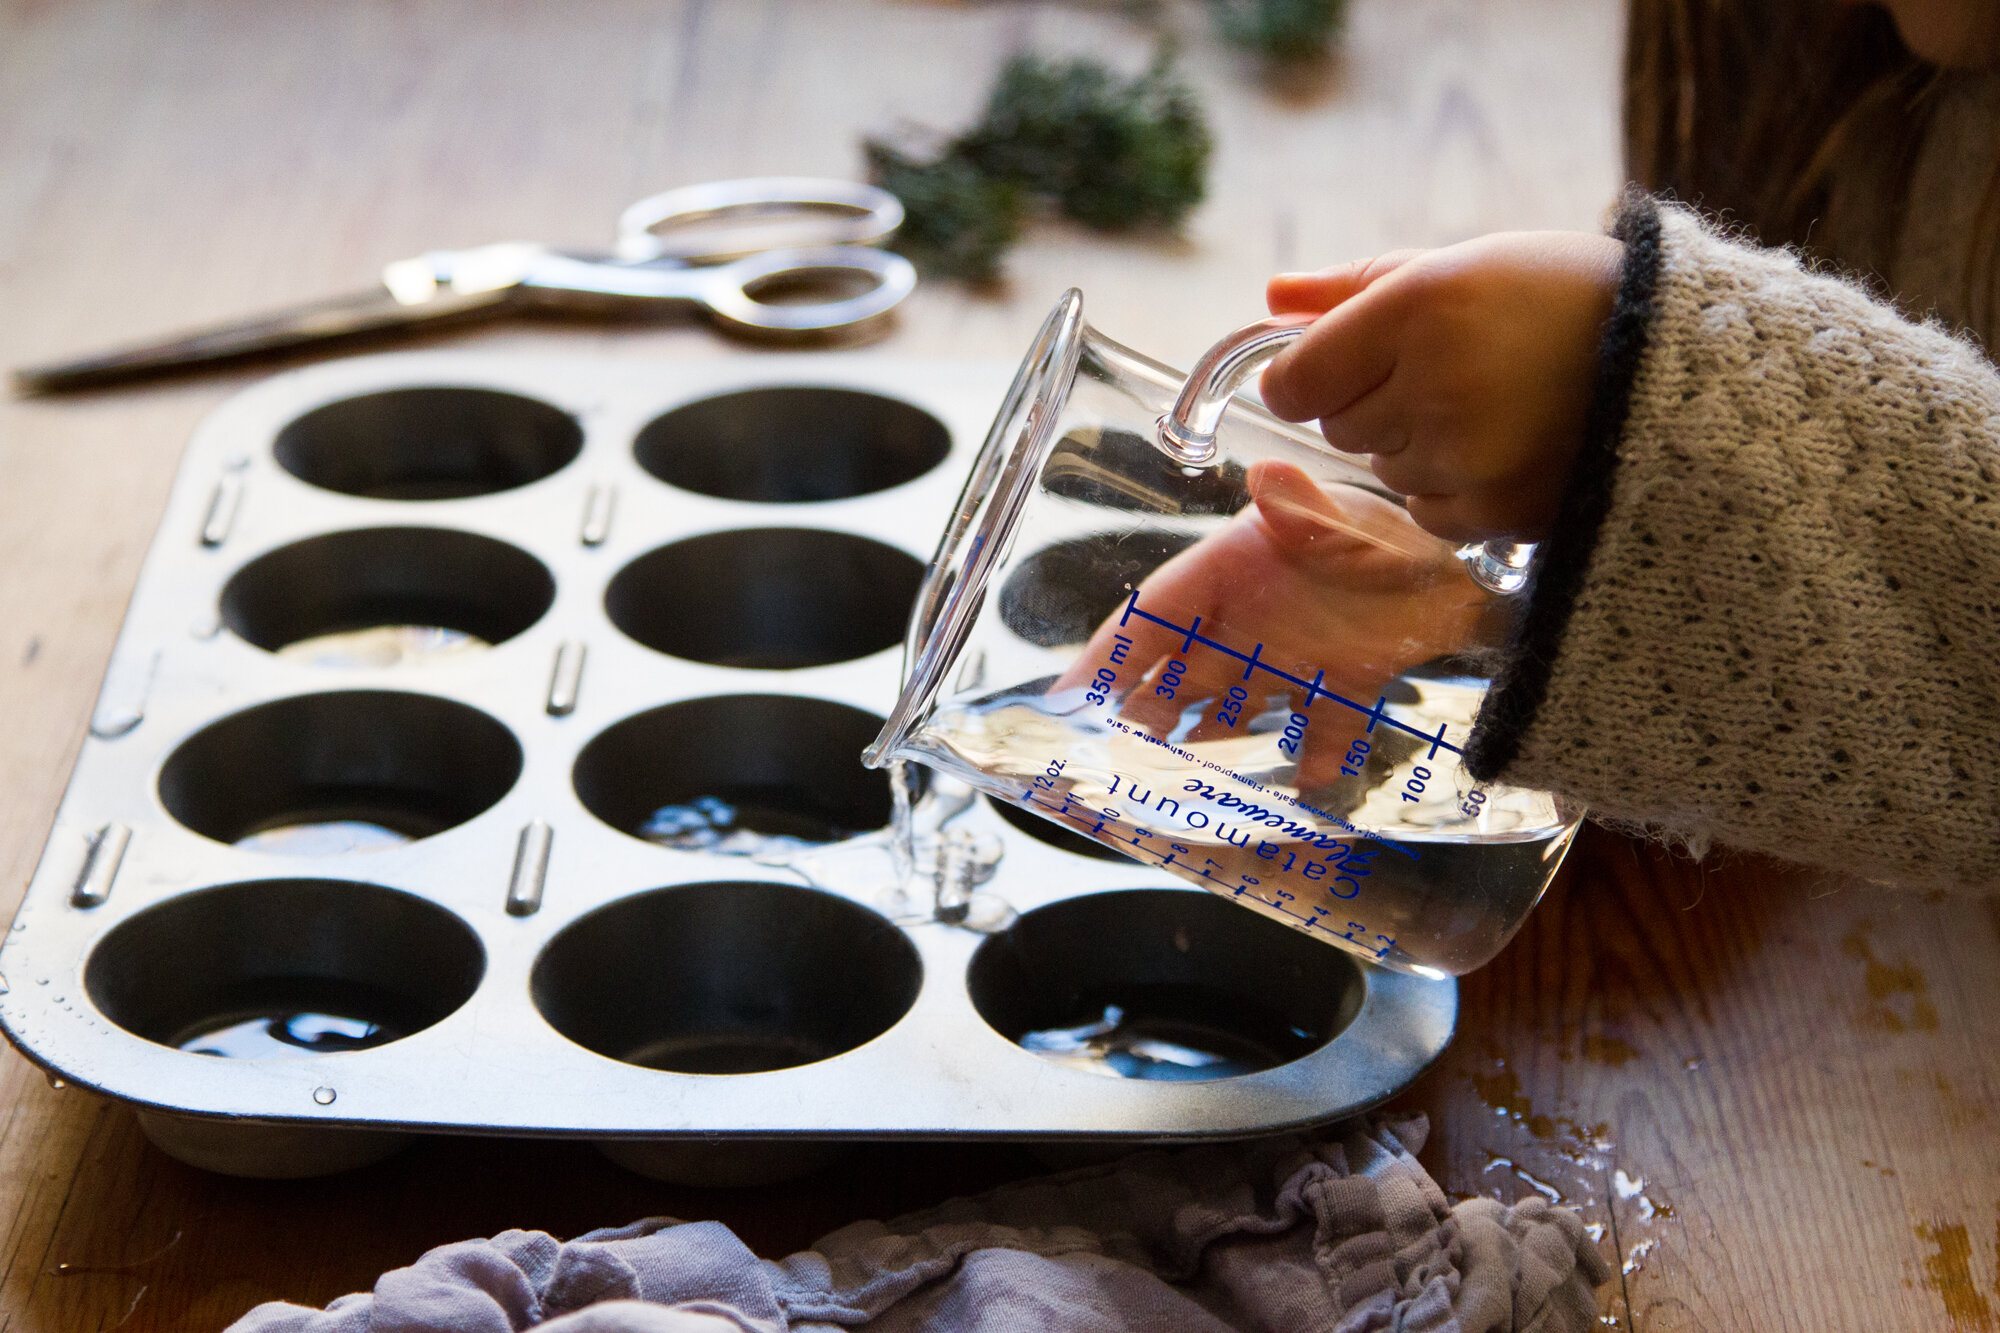
+ Fill the muffin tray 2/3 way with water.
+ Arrange whatever wintry bits you’d like to in each tray.
+ Tie a knot in the middle of a length of twine and submerge the knot into the tray. If it floats to the top, arrange greenery on top of the knot so that it sinks. The knot will freeze into the ice and leave you with two long ends of twine to tie onto tree branches, or fence posts, or, like us, along your neighbor’s banisters.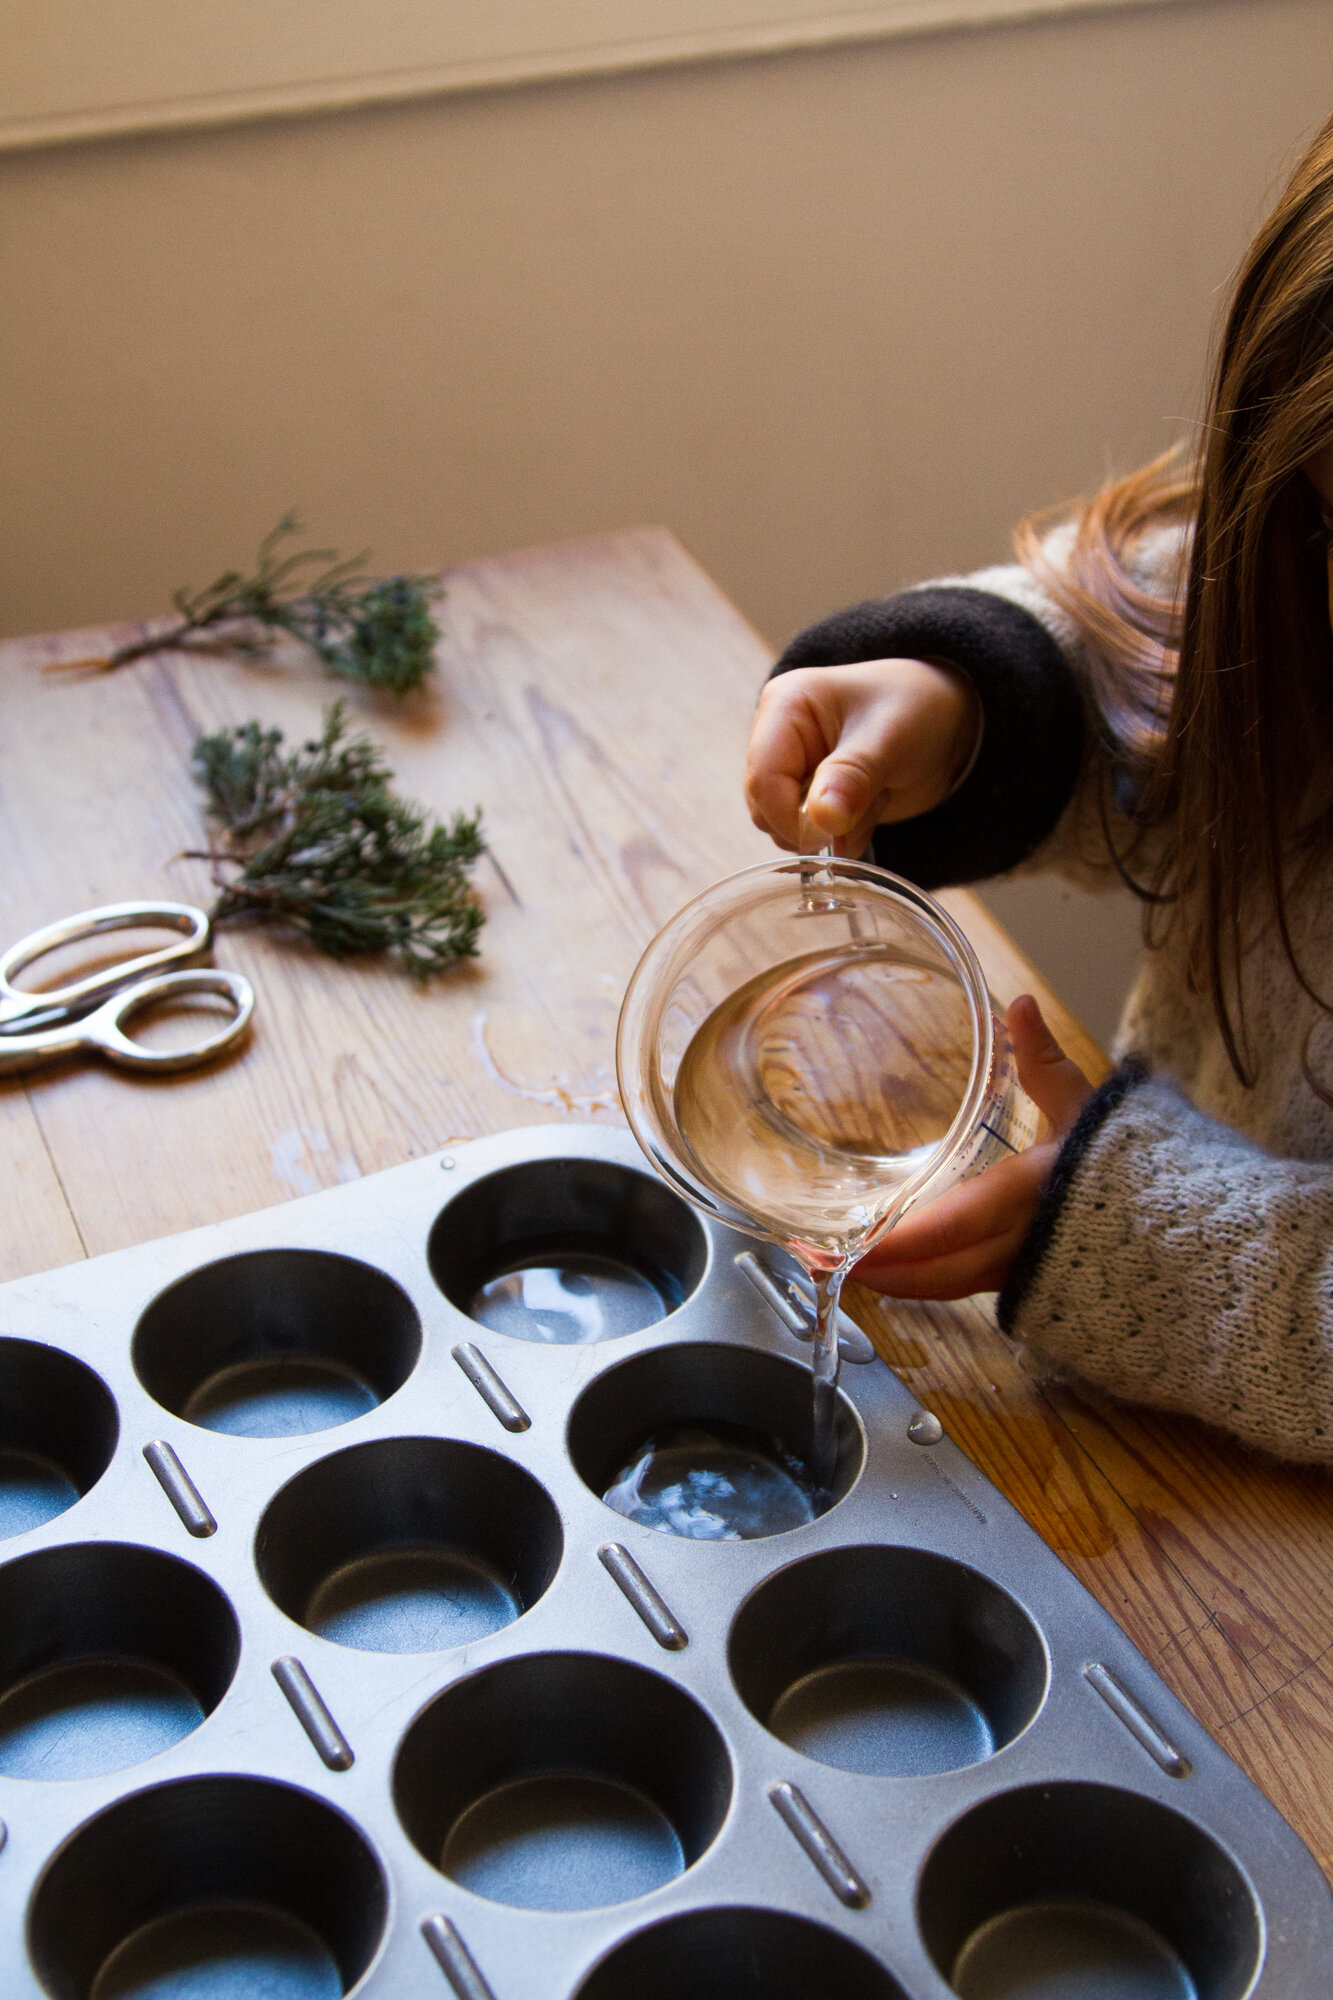
This project is decidedly not for toddler’s only, but if a little guy in your life is anything like this little guy in my life, you might find this project is readymade for eager pourers.
 If you live in a very very cold place, where there’s not a risk of rising midday temps melting your ornaments too quickly, I would make even thinner ornaments, but otherwise, filling up each muffin slot 2/3 of the way with water worked well for us.
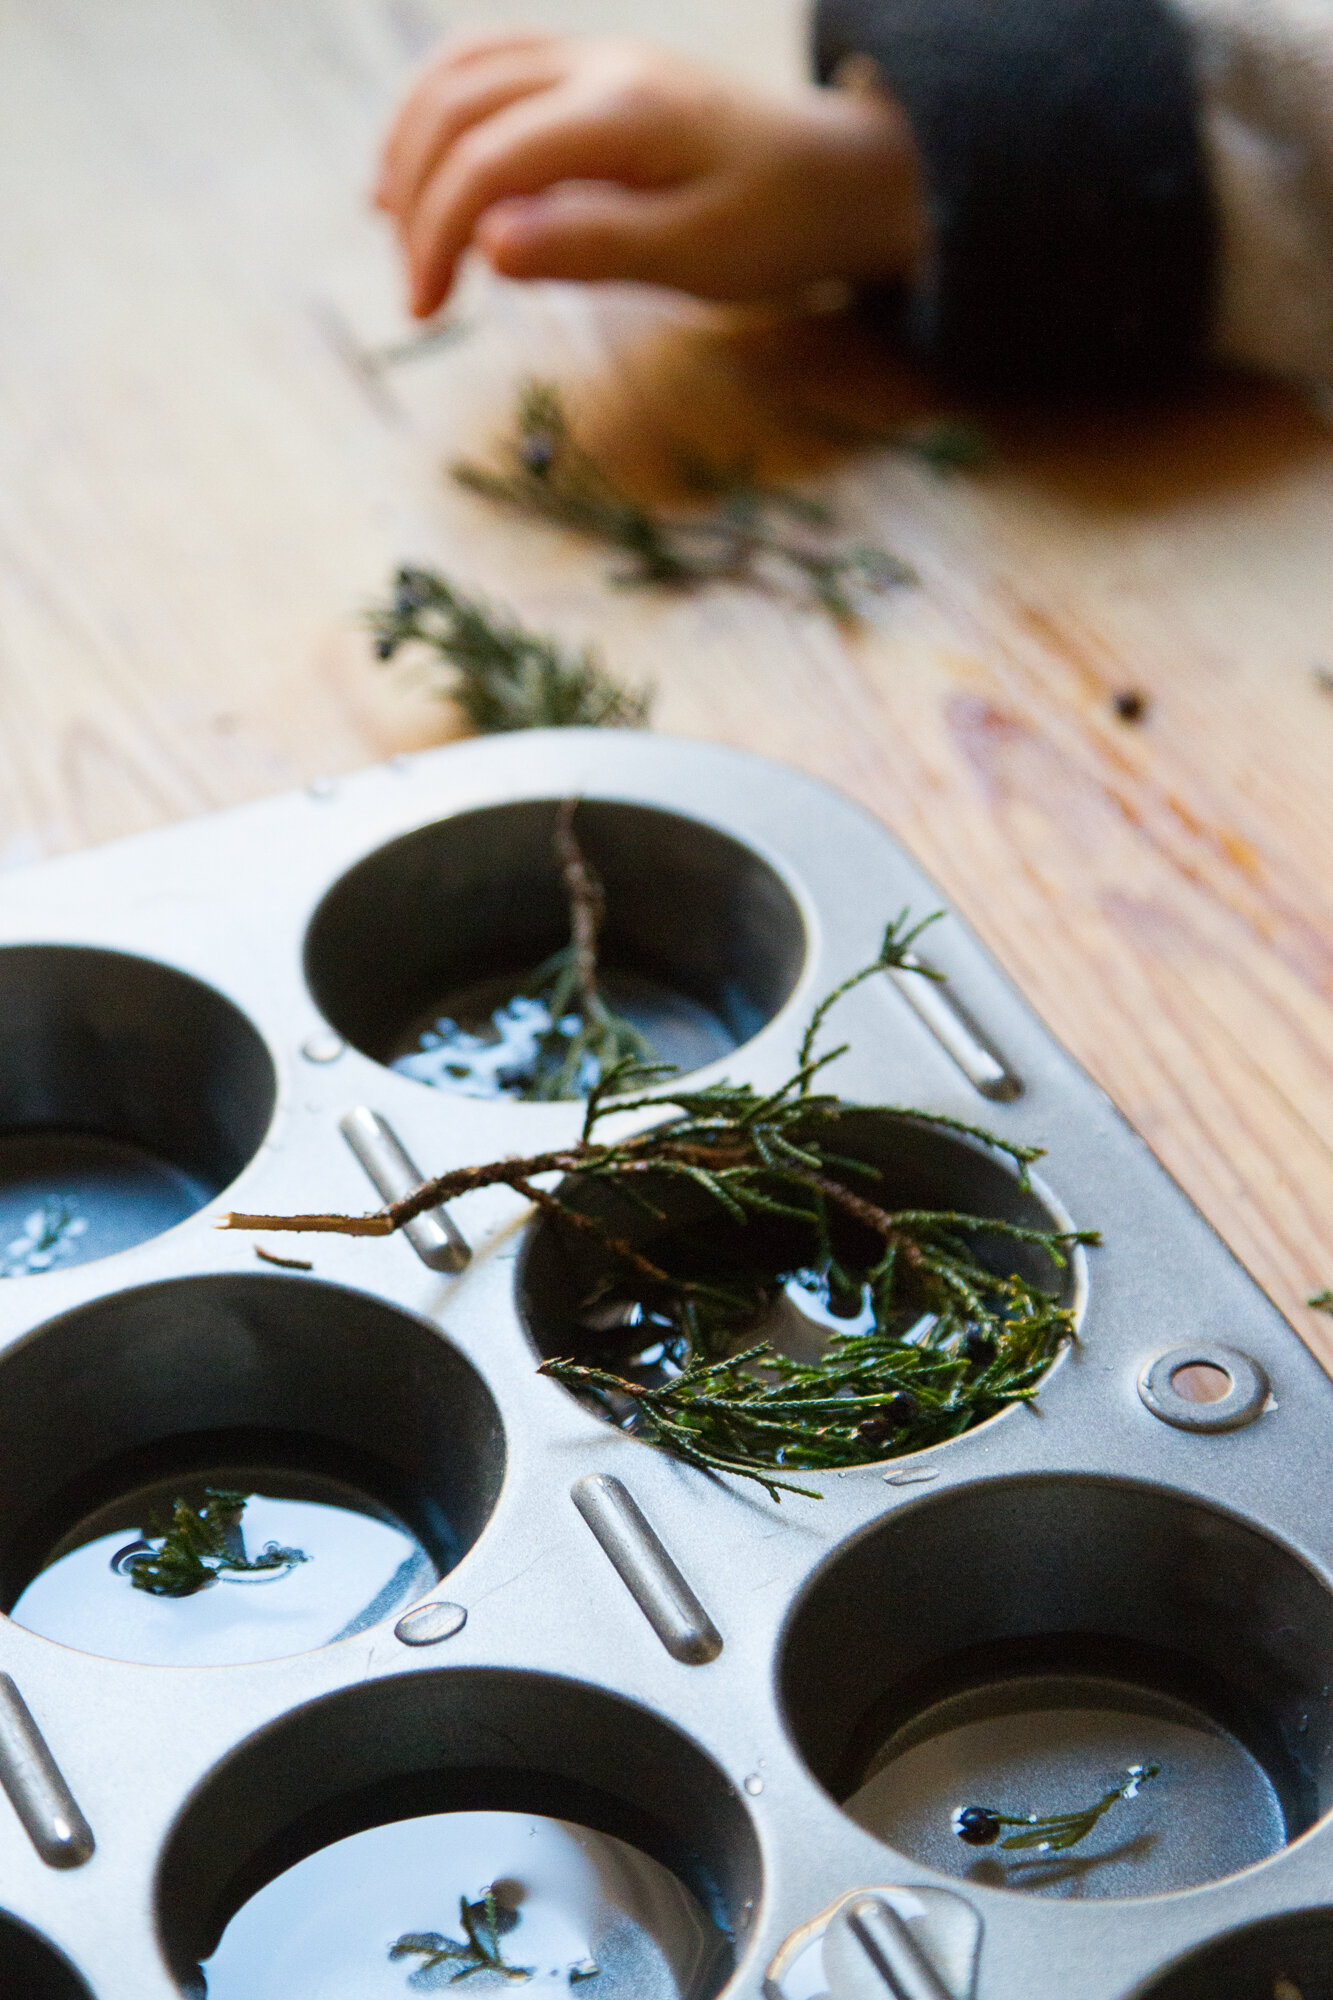
Faye helped me arrange bits of juniper branches that my mom and dad foraged for me in Connecticut. I think we’ll make another batch later this winter with bird seed.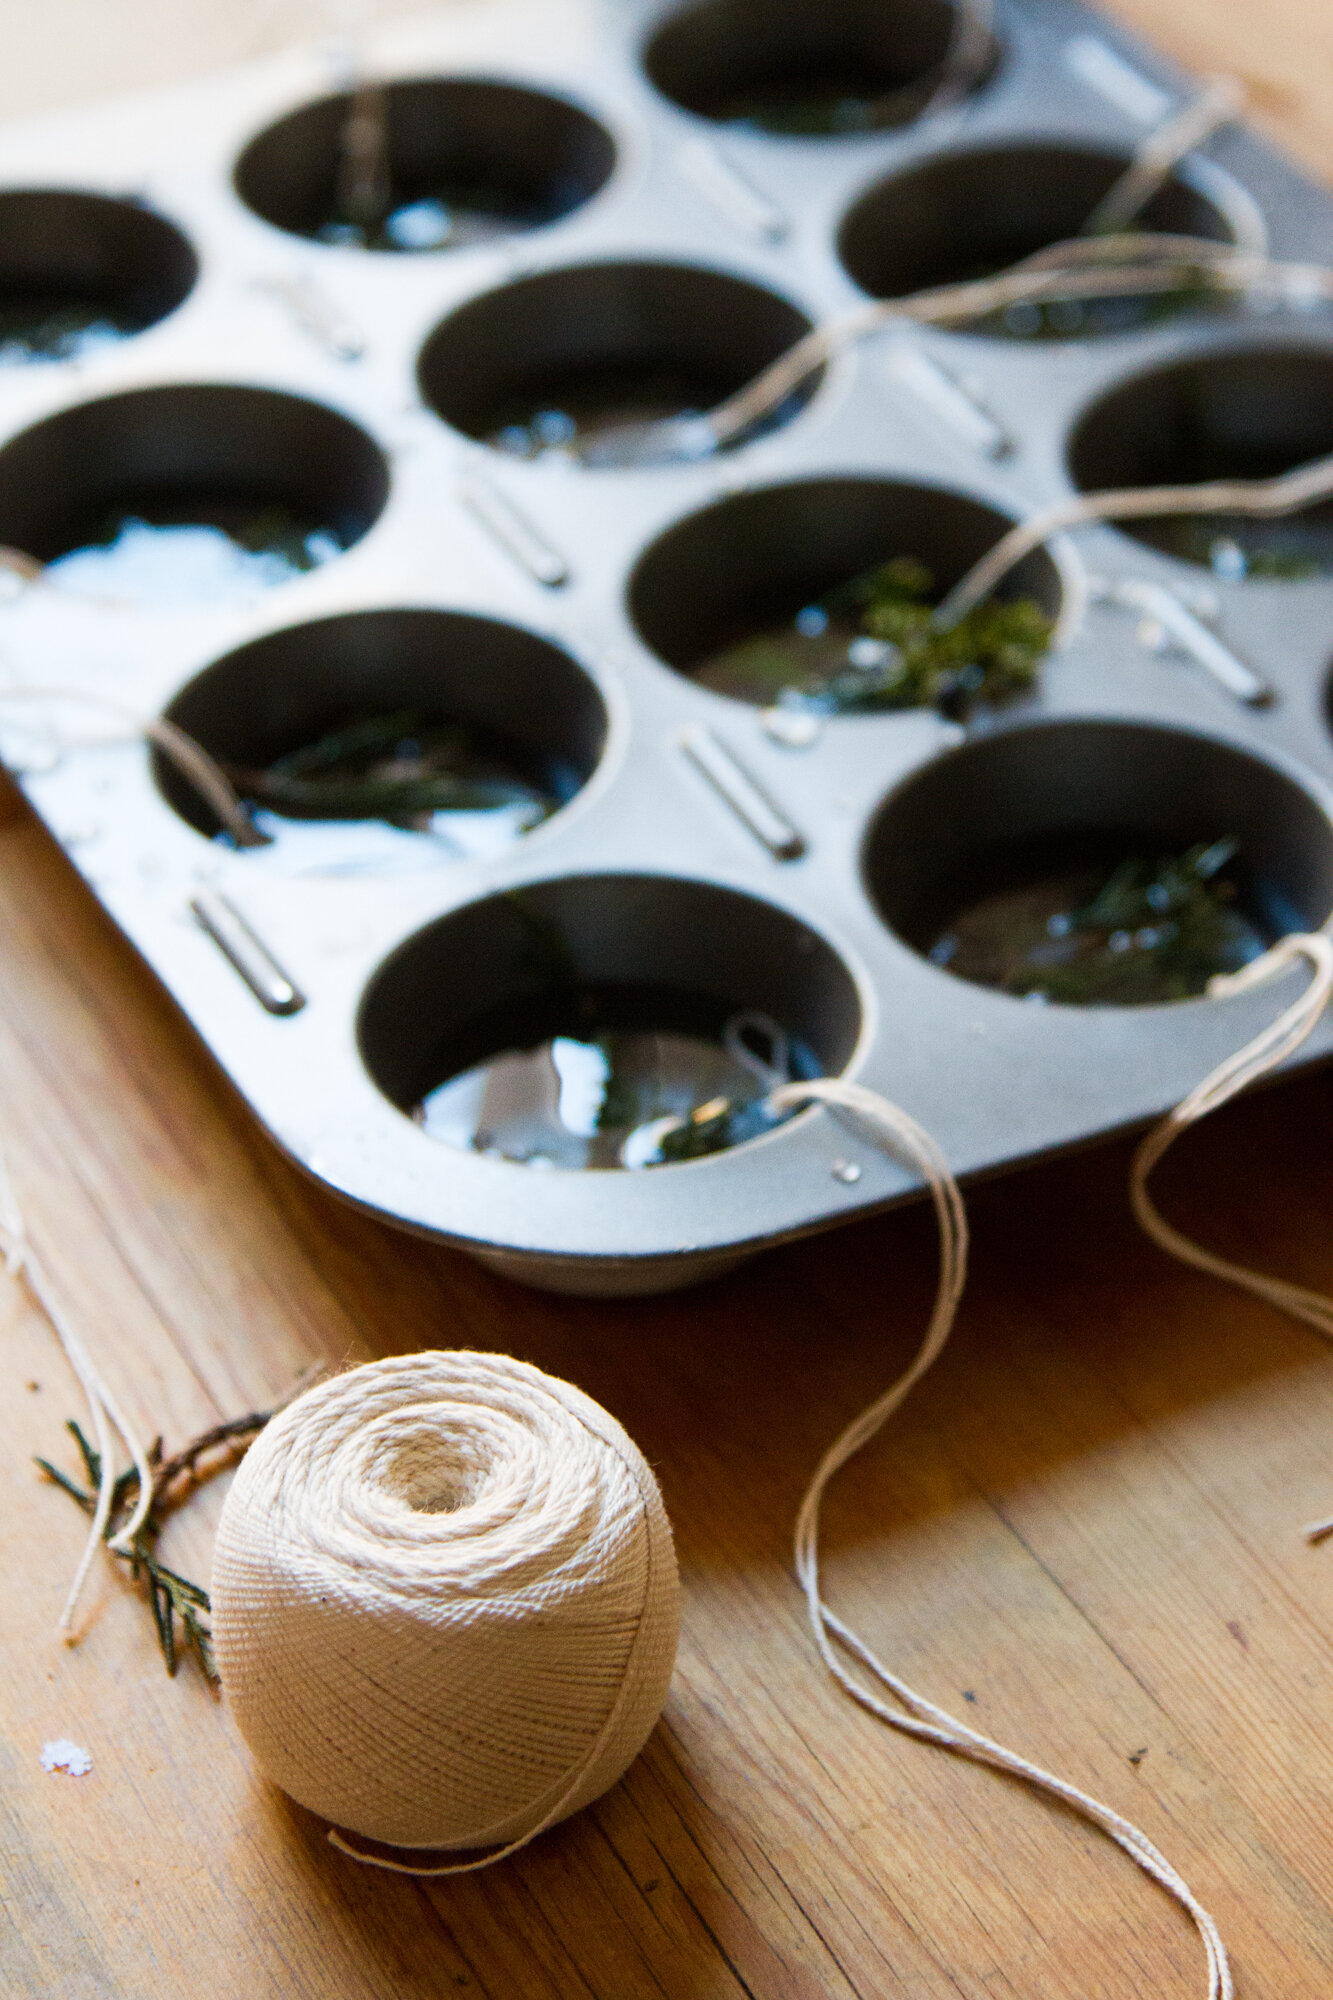
I used very fine butcher’s twine because it’s cheap and strong and biodegradable, but still delicate enough to be inconspicuous.
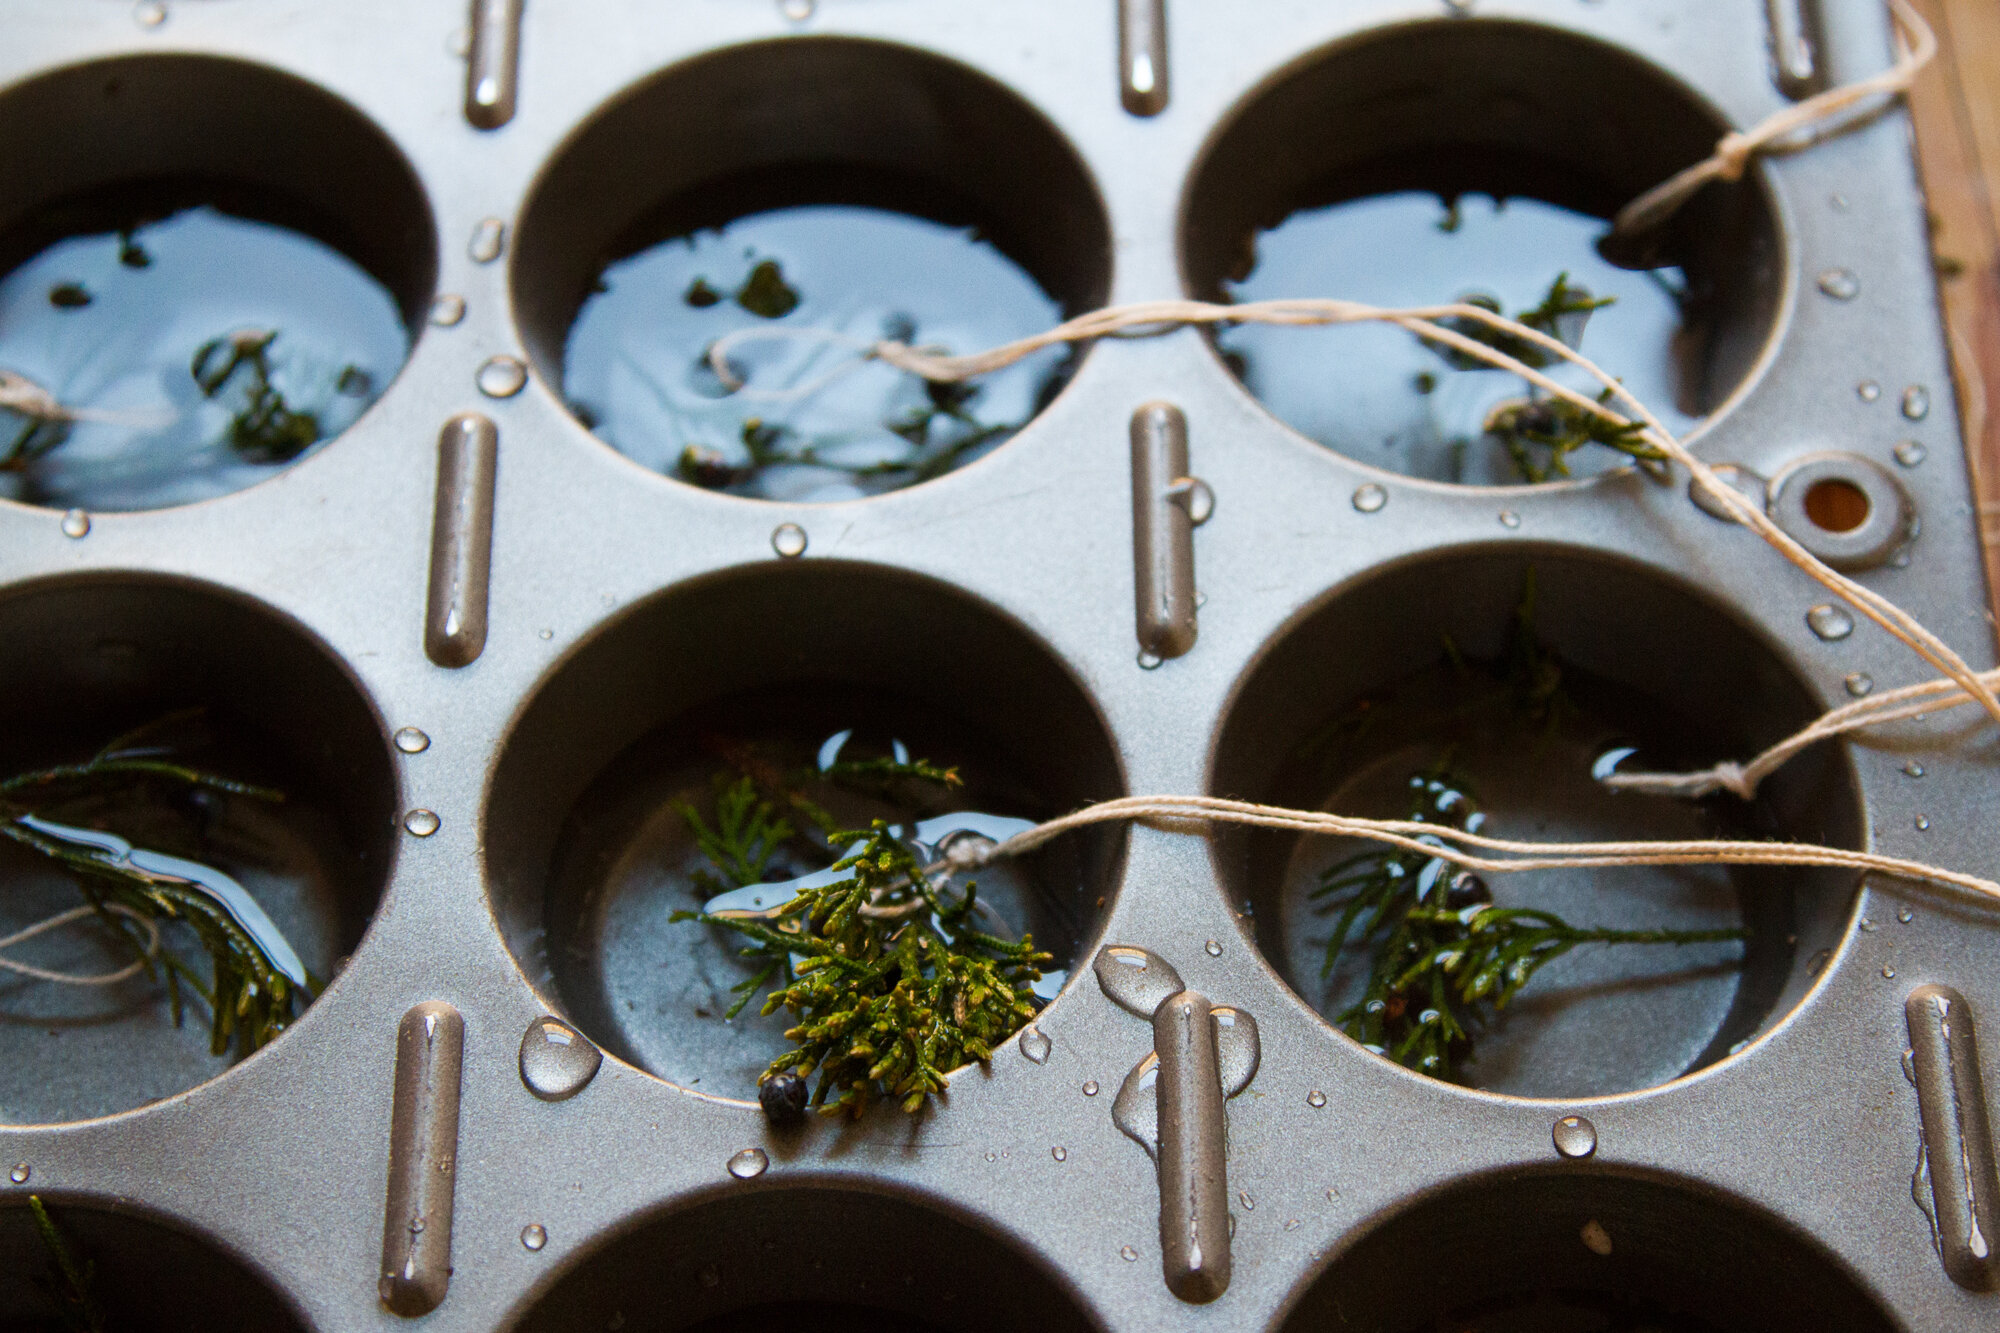
If your string pops up, tuck it underneath your greenery so that it gets frozen inside the ornament as much as possible.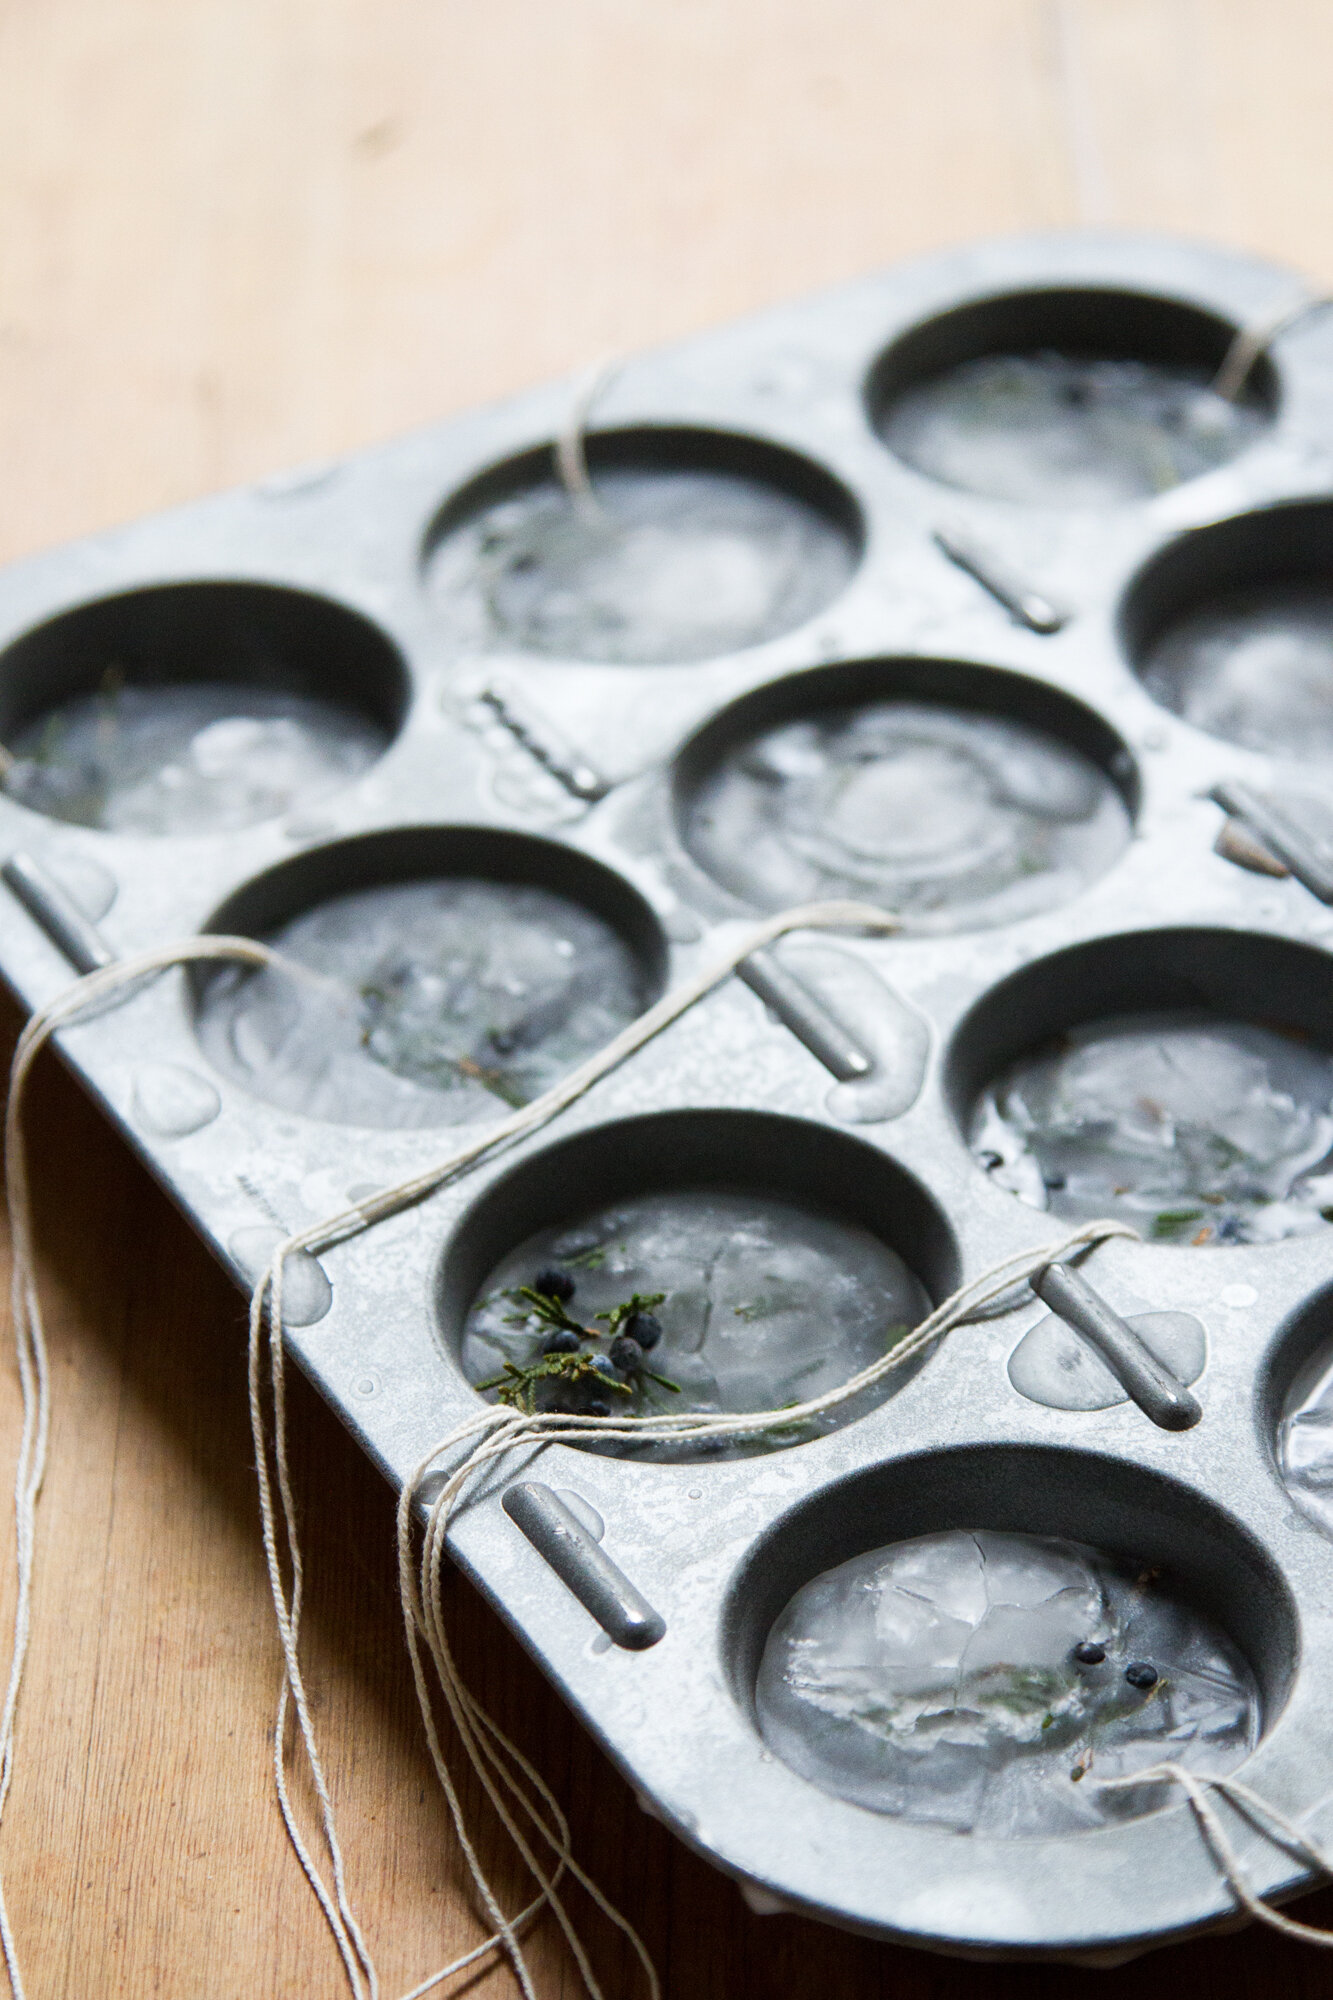
Because we had the option, we hurried things up by putting our ornaments into our freezer. If you are more patient, or live in a spot that’s very cold, you could, of course, choose to harness the power of the frigid air and stick your muffin tray directly into the great outdoors.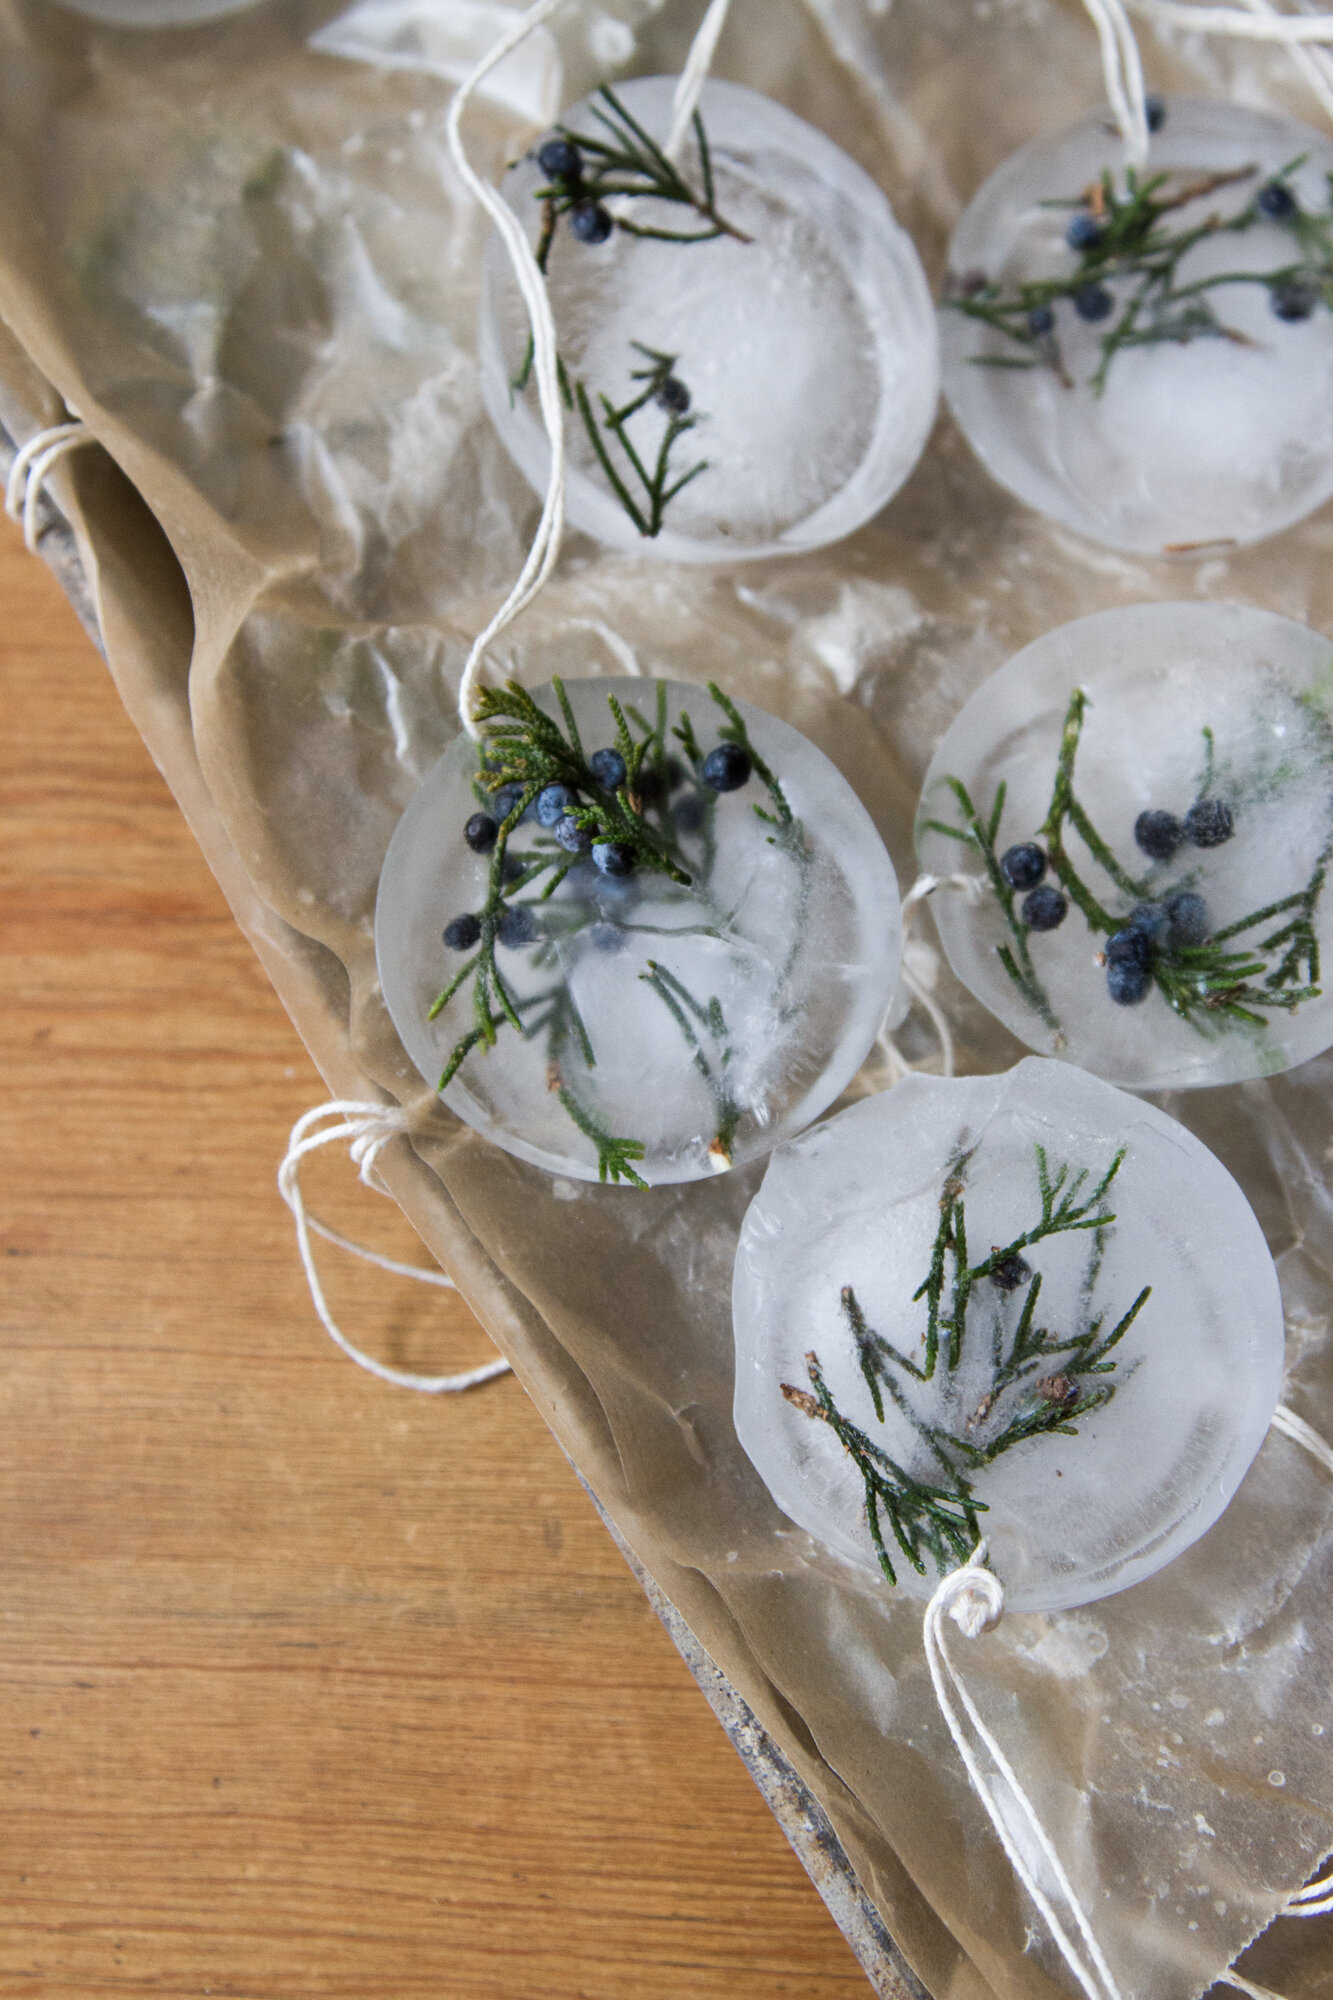
Running just a little bit of warm water along the back of the muffin tray will loosen the ornaments. We only have one muffin tray, but we wanted to make lots of ornaments, so we popped ornaments out of the tray between batches and kept them on a waxed paper-covered baking trays in the freezer.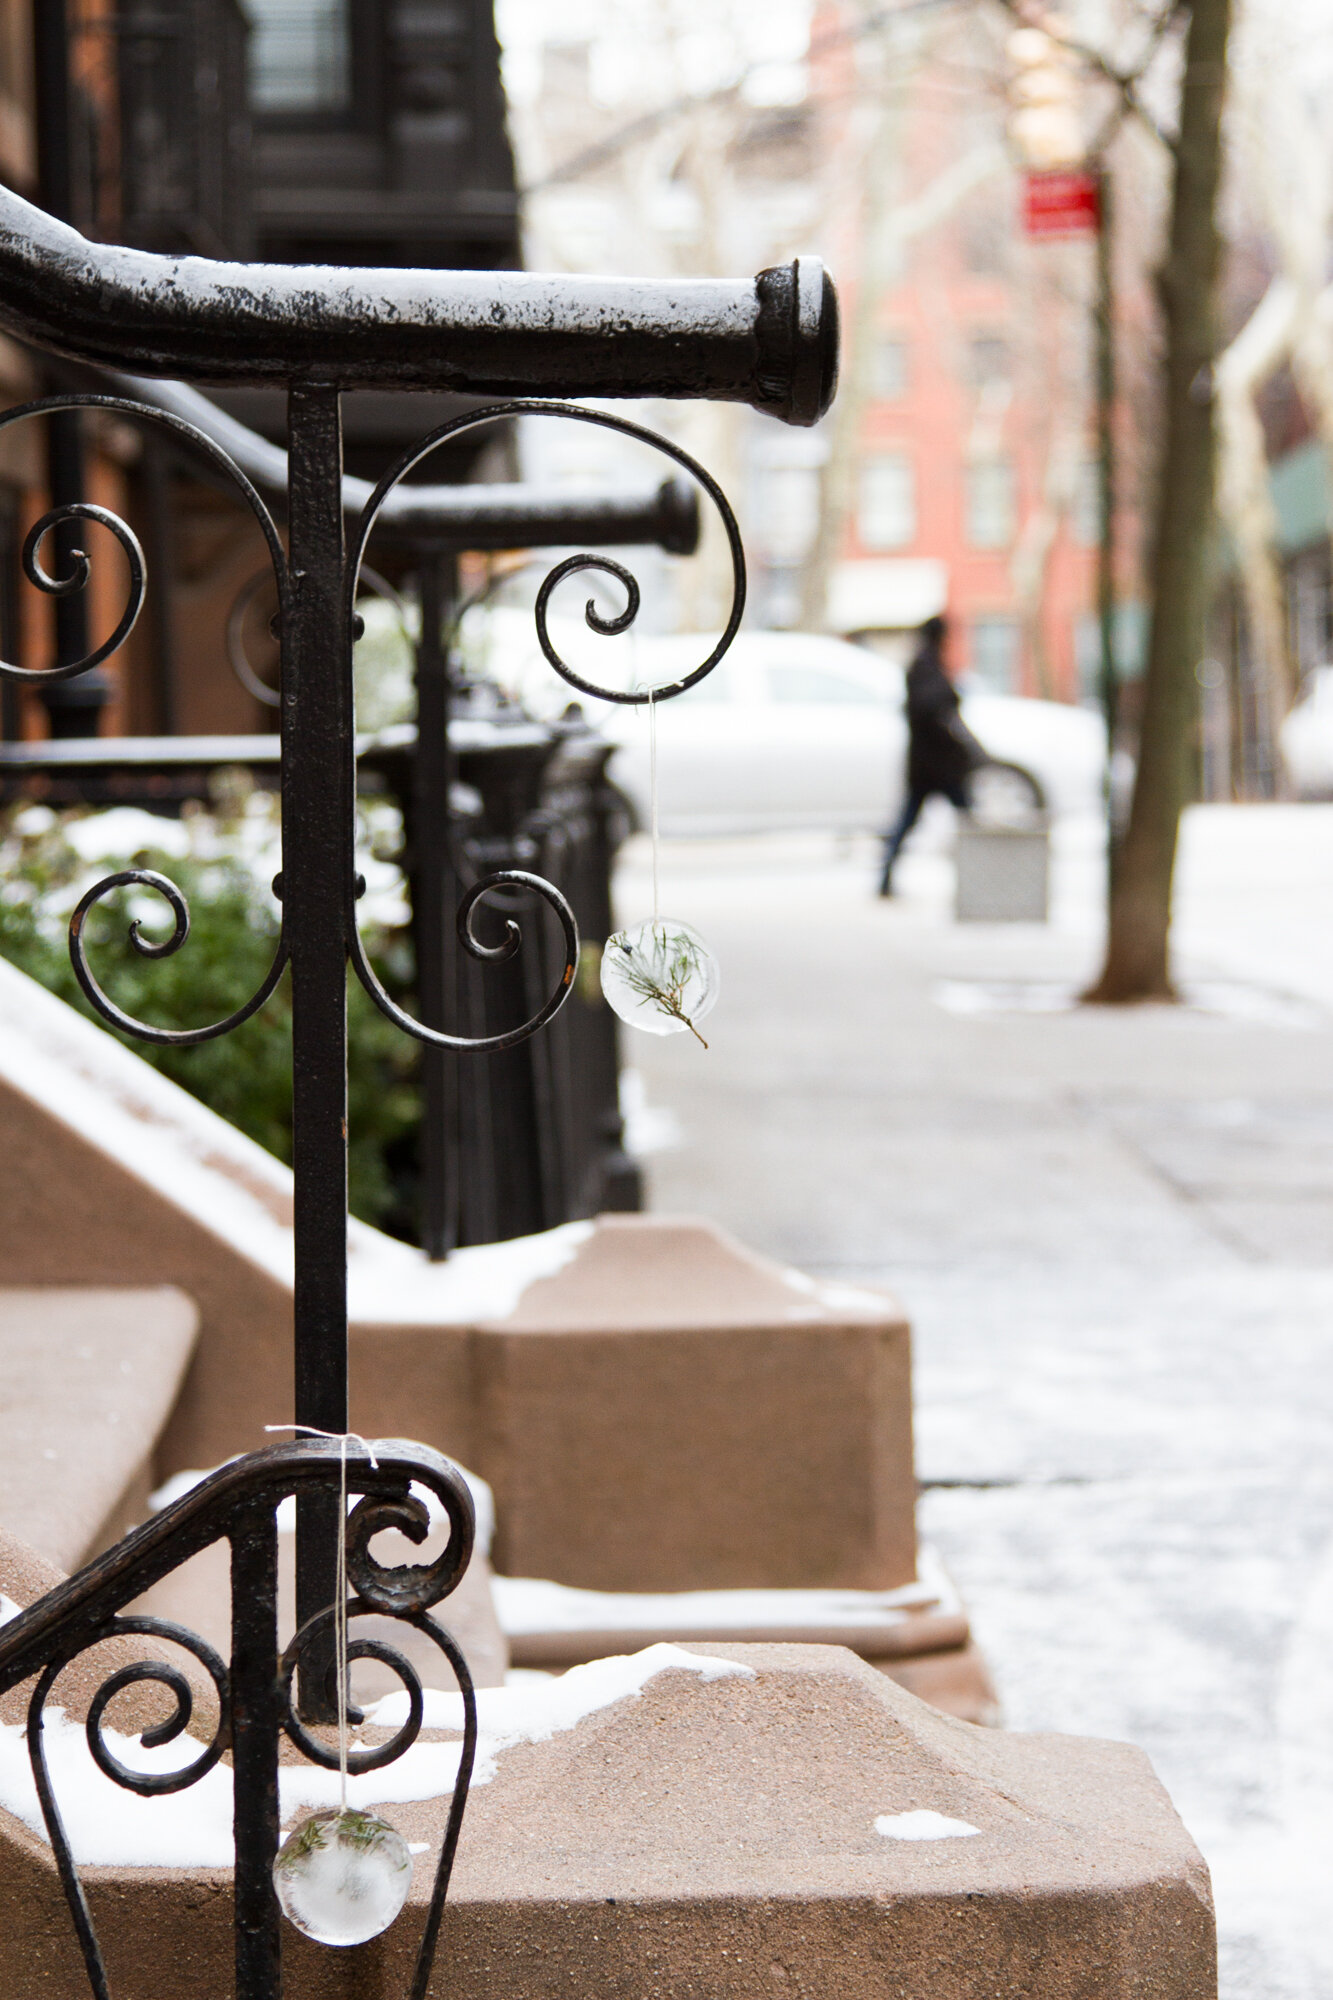
We waited for a freezing day and carried our ornaments downstairs in a metal bowl we’d kept in the freezer so that they didn’t start to melt too quickly on our way outside.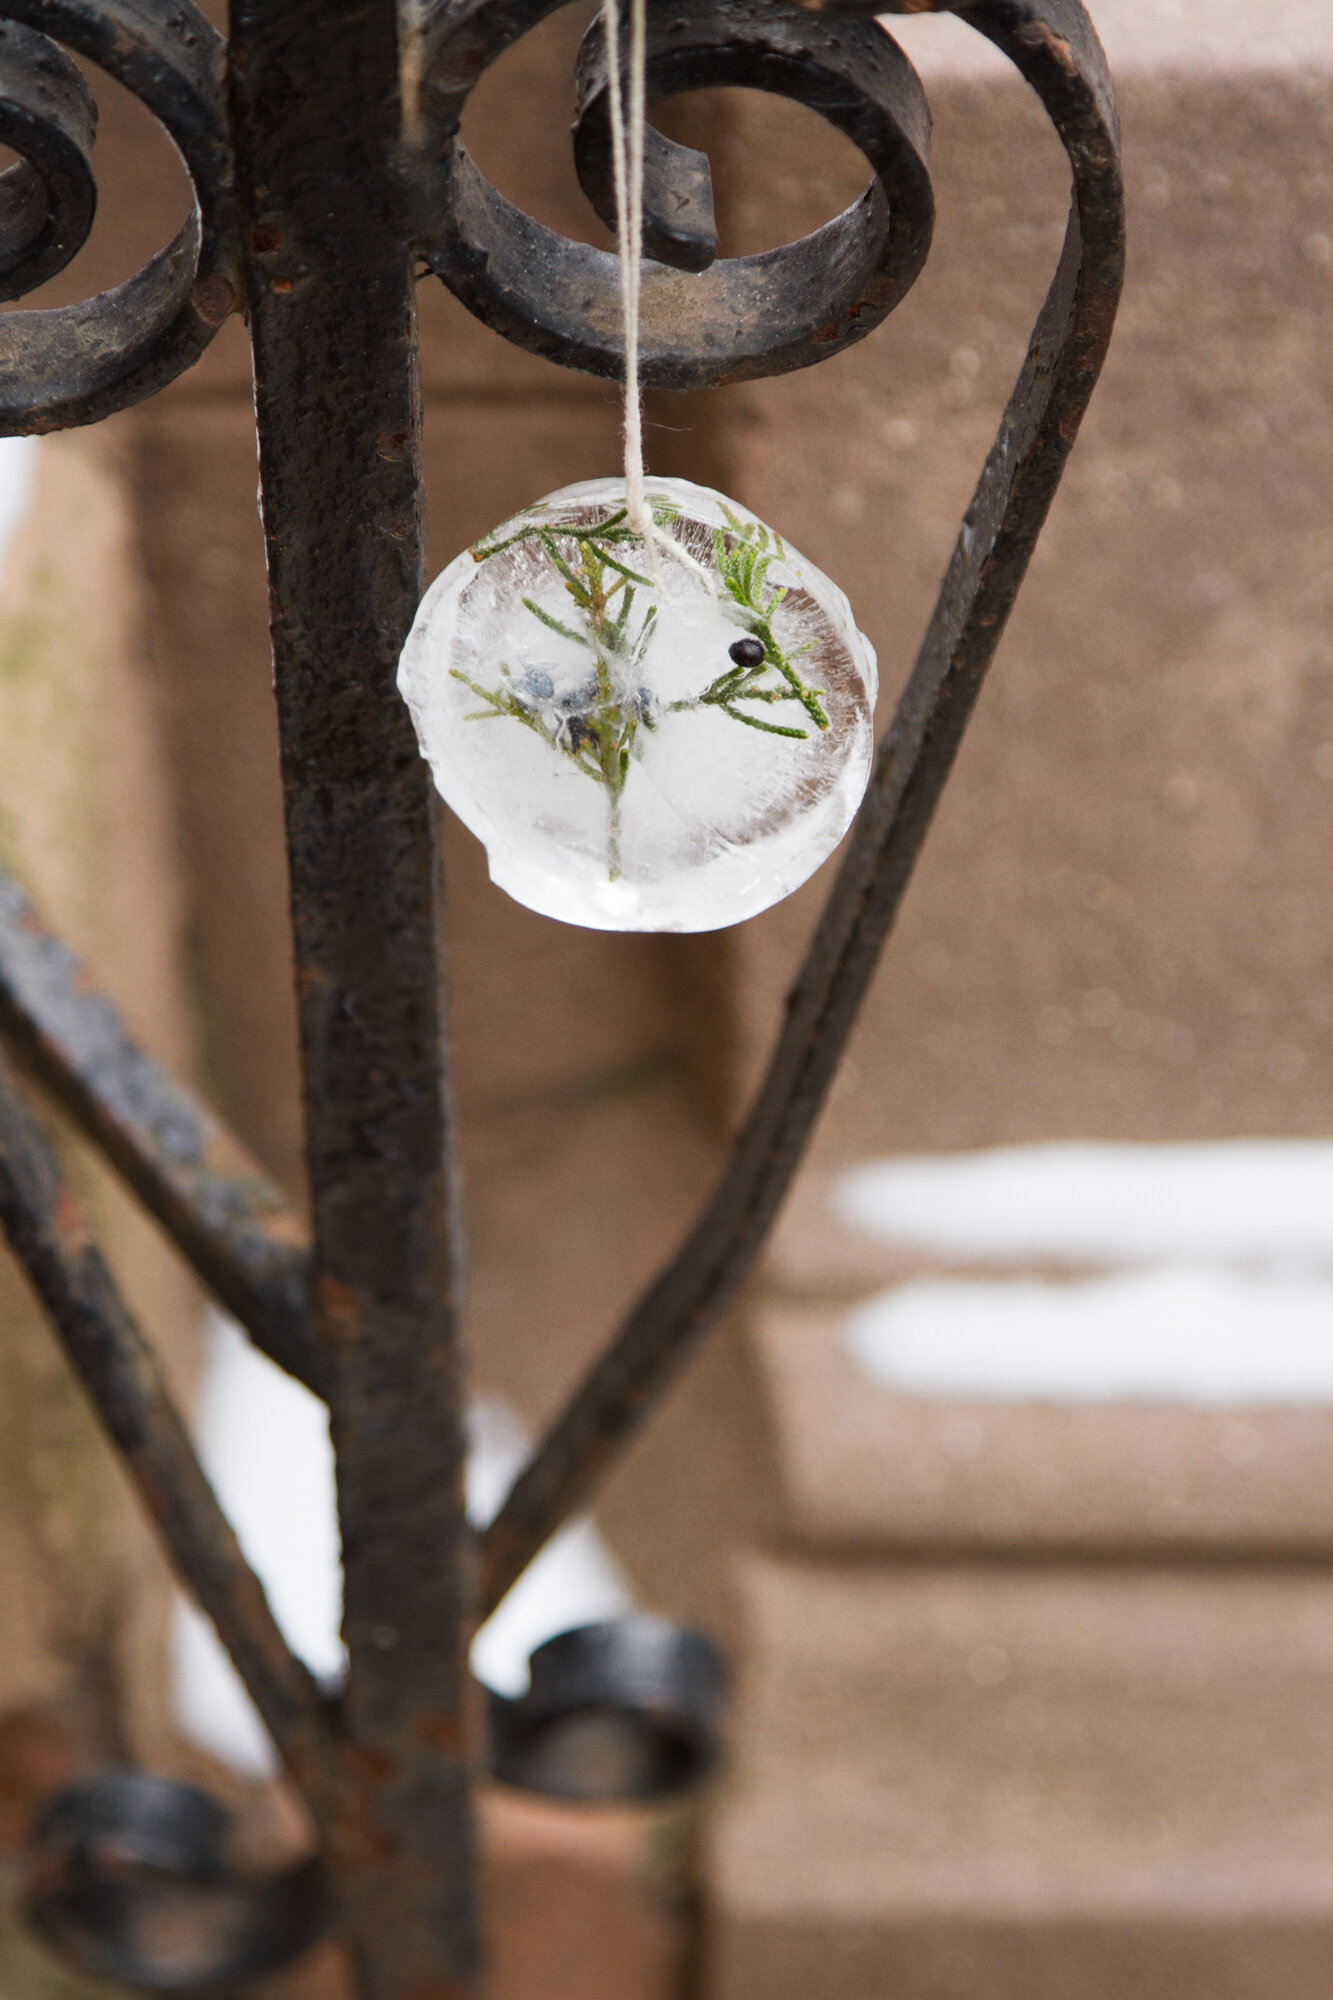
What do you think? Have you made ice ornaments before? What might you add to yours?


33 Comments
That is such a charming idea. Love the thought of using bird seed too.
I really like the idea of someone walking by and noticing a sweet surprise. It would certainly make me smile☺
This is so sweet! It feels like a picture book come to life.
Love this idea! This year I only put dried orange slices and danish paper stars (add this to your homespun holiday crafts of the compostable sort!) on our tree since they could pose no harm to our curious 14 month old. He loves taking them on and off the tree and is fascinated by the whole concept really. This is a great way to extend his interest!
Love this idea. I wish it we’re on a cooler weather. But in this part of my world, it will melt straight away!! haha.
that is just such a lovely idea <3 I wish it would be finally freezing here… definitely going to try that! thank you so much for the inspiration 🙂
Cute! We’ve never done these before, but we have made lanterns from a bucket of water you put out to freeze. If I remember correctly, you let the water partially freeze, and then dump out the remaining water, leaving an ice shell. Then you can put a candle inside. It looks really beautiful.
Yes, lovely! I’ve got an alternative method coming up later this week!
I love this idea so much. It’s not cold enough here in Portland, OR, but maybe we’ll make some ahead of our trip up the mountain later this week.
Thanks for the buy nothing inspiration.
Rebecca
We also do that 🙂
A little more of the watercolor, and the flashlights will be colorful.
Beautiful! And refreshing somehow not to have more things to buy but something lovely to make and share
I agree. This is so much more beautiful than a gift guide.
Can’t wait to try this with my son! We’ll keep an eye out for them when we visit Brooklyn:)
Love this idea! Definitely going on my list of things to make this winter…here in MI we (unfortunately) will have LOTS of freezing days 🙂
Excellent! We just did the same thing last week.
These are so pretty. What a great idea!
So pretty! I read an article earlier this week (can’t remember where) which said that if you make your ice cubes from boiling water versus cold water then they’ll freeze clear rather than cloudy.
I love this idea! I’ve never seen ice ornaments before. If we end up getting any freezing weather at all this season, my kid s and I are definitely making some.
I love this idea! Thank you for sharing 🙂 we’re about to get a cold snap here over Christmas so this will be the perfect to do then ^_^
Very Creative and simple Erin!
love thisi idea unfortunately there will be too many warm days
Thank you for sharing this and not a gift guide. This is lovely and graceful and perfect.
We saw these and knew they were yours:)
Hudson was amused-
Brooke
This is just so delightful!
I think my favourite project of yours to date.
Well in Aix-en-Provence we could not unfortunately do this but this is such a good idea! Pretty, festive and shared by all.
Thank you Erin! Love your daily posts as usual! Merci beaucoup
So creative! I love this idea so much but unfortunately it doesn’t work in sydney, even in winter :{
Thank-you…your beautiful and simple posts inspire me and really help me to get through the holiday season in a positive way with less stress
Such a lovely idea, and one we’ll definitely be trying this winter! I’ll probably stick to decorating our yard, though, so the strings don’t wind up getting lost once the ornaments melt…
It’s super easy to collect the stings after the ornaments melt! I’ve been gathering them all week!
Lovely!
Wondering, if you have a substantial sprig and you tie the string to the sprig, maybe it’d remain as a little ornament even after the ice melts?
Sounds like it, doesn’t it? Great idea!
Love this! Thank you for posting
How magical!
Comments are moderated.